
What's below your court matters.
Most courts look alike the day they're finished. The difference shows up after a few Wisconsin winters. Here's how we lay out, build and light a court so it plays the same in year ten as it did on day one.
Shortcuts in the ground show up on the surface
Many courts start failing within a few years, and it's almost never the paint. The problems start with base and drainage work you can't see once the court is finished.
Standing water
Poor drainage leaves puddles, often called birdbaths, that stop play and break down the coating.
Base movement
A thin or poorly compacted base settles unevenly, and the surface follows it.
Freeze-thaw cracking
Water trapped under the court freezes and expands every winter, opening cracks.
Inconsistent play
Dips, humps and slopes that are too steep change how the ball bounces and how the court feels underfoot.
- Soil or thin gravel under the asphalt
- No drainage layer
- Slope guessed, not engineered
- Cracks and puddles within a few seasons
- Consistent ball bounce
- Proper court drainage
- Structural stability
- Long-term durability
The difference isn't what you see. It's how the system is built underneath.
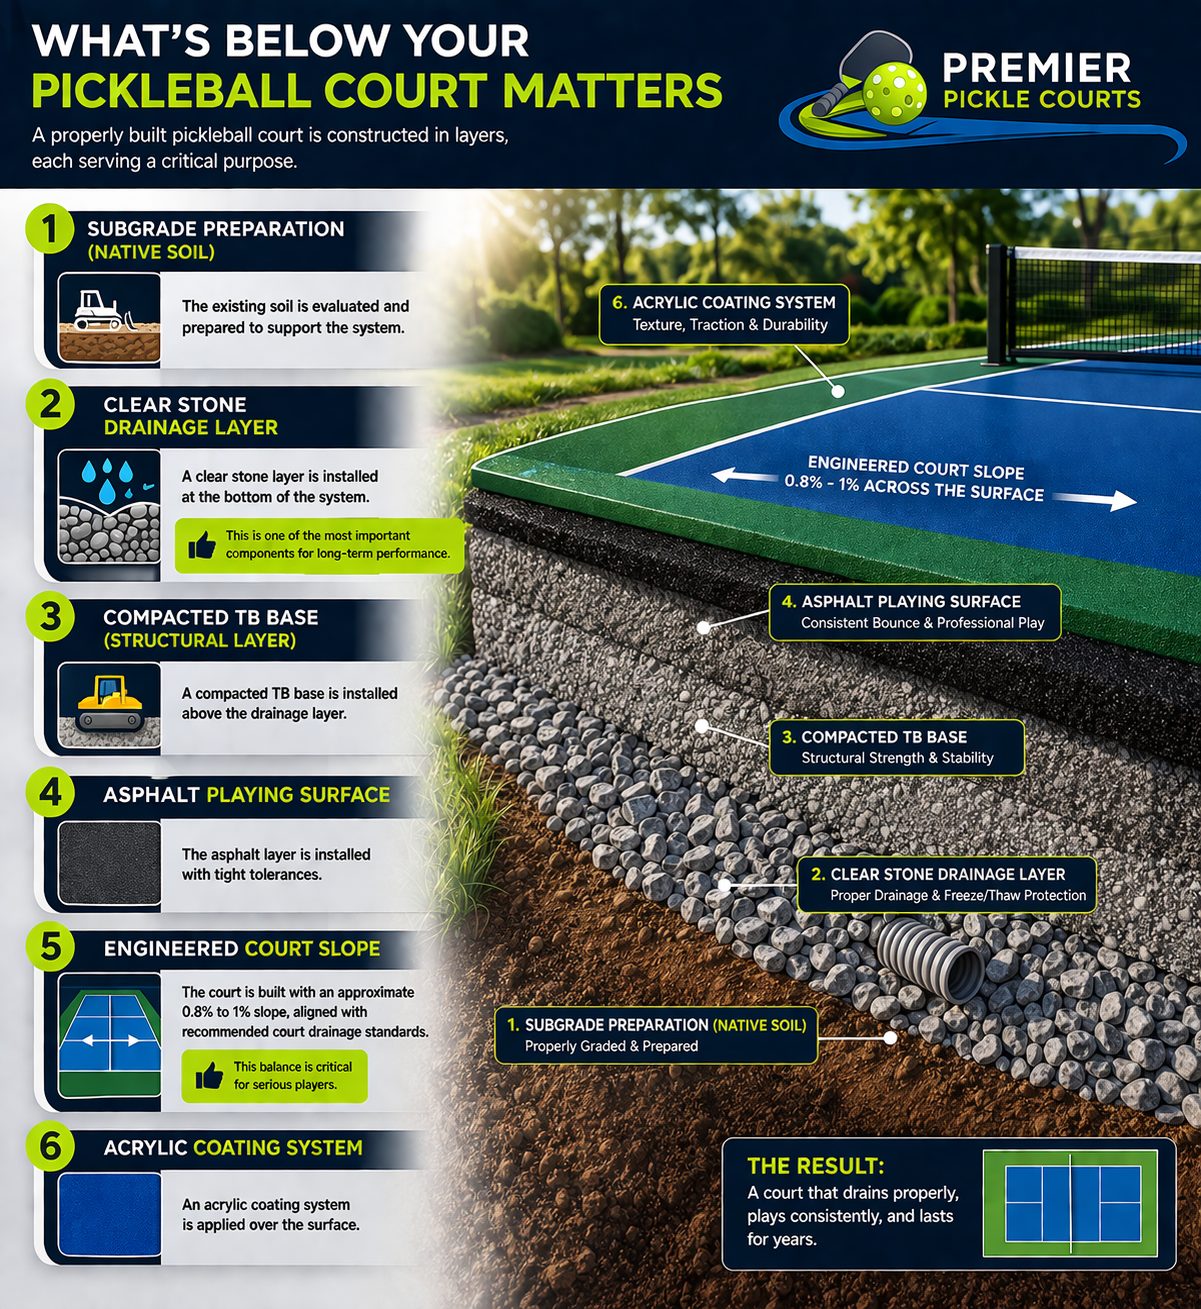
A court is built in layers, and each one has a job
Subgrade preparation
The native soil is evaluated, graded and compacted so it can support everything above it.
Clear stone drainage layer
Clear stone at the bottom of the system moves water out and protects against freeze-thaw damage. It's one of the most important parts of a long-lasting court.
Compacted TB base
A compacted traffic-bond base above the stone provides structural strength and stability.
Asphalt playing surface
Asphalt is paved to tight tolerances for a flat, consistent surface and true bounce.
Engineered court slope
The surface is built to a 0.8% to 1% slope, aligned with recommended court drainage standards.
Acrylic coating system
A multi-coat acrylic system adds color, texture and traction. We use PickleMaster, made specifically for pickleball.
Regulation size, with room to play
Every court we build uses regulation pickleball dimensions. The lines are only part of it. The run-off space around the court is what lets players chase down wide shots and lobs safely.
| Court (lines included) | 20′ × 44′ |
|---|---|
| Non-volley zone (kitchen) | 7′ from the net, each side |
| Service courts | 10′ wide × 15′ deep |
| Line width | 2″ |
| Net height | 36″ at sidelines, 34″ at center |
| Net posts | 22′ apart, outside the sidelines |
| Minimum playing area | 30′ × 60′ |
| Preferred playing area | 34′ × 64′ (what we recommend) |
Building more than one court? See multi-court layouts or the pickleball court dimensions & layout guide from Premier Turf & Greens.
0.8% to 1%: enough to drain, not enough to notice
A court has to shed water, but players shouldn't feel it. We build the surface as a single plane at 0.8% to 1%. On a 34-foot-wide playing area, 1% is only about 4 inches from one side to the other.
- Too flat: water sits in low spots and play stops after every rain.
- Too steep: the ball runs downhill and players feel the tilt.
- Engineered: water drains quickly and the court plays level.
Lighting planned before a single pole goes in
Evening is prime time for a backyard court. We model the light levels for your court before installation, so you know it will be bright and even, with no dark corners or glare in your eyes on a lob.
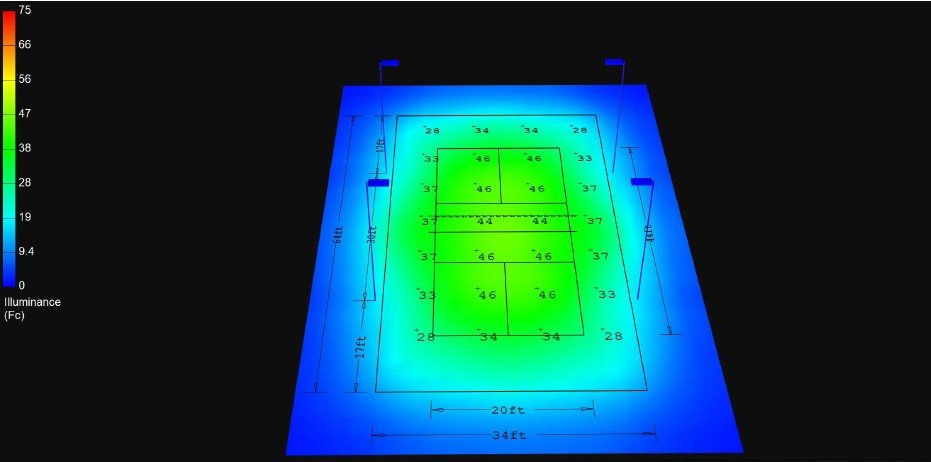
Even, not just bright
Uniformity matters more than raw brightness. An average-to-minimum ratio of 1.35 means the ball looks the same at the baseline as it does at the kitchen line.
Poles placed for play
Fixtures sit outside the sidelines, set in from each end, so they light the court without shining into players' eyes on serves and lobs.
Class III recreation
This plan meets the lighting class used for recreational play. Commercial and tournament courts can be designed to higher levels.
Landscape lighting to match
Paths, patios and plantings get softer landscape lighting from Liban Landscape, so the whole space works after dark.
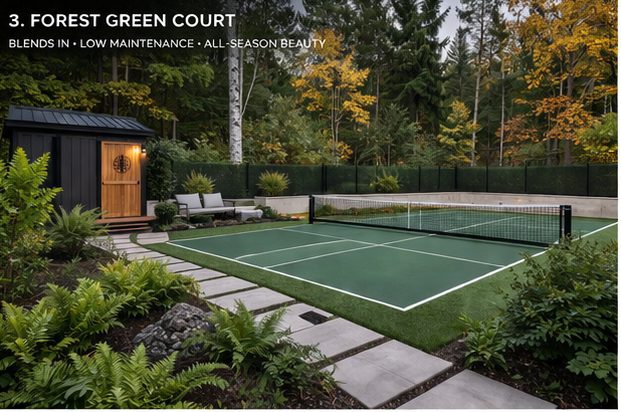
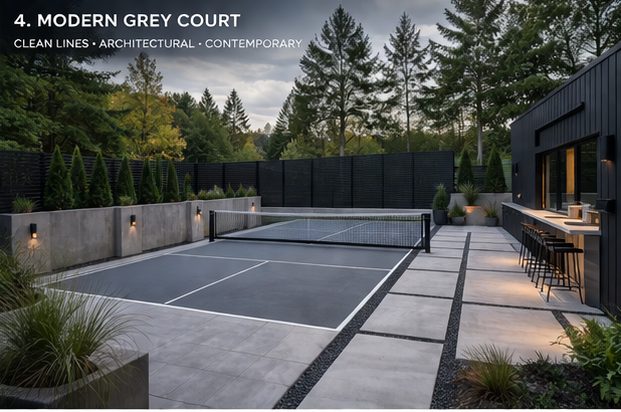
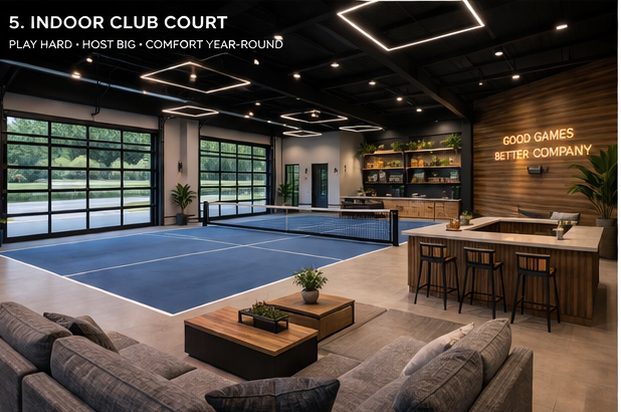
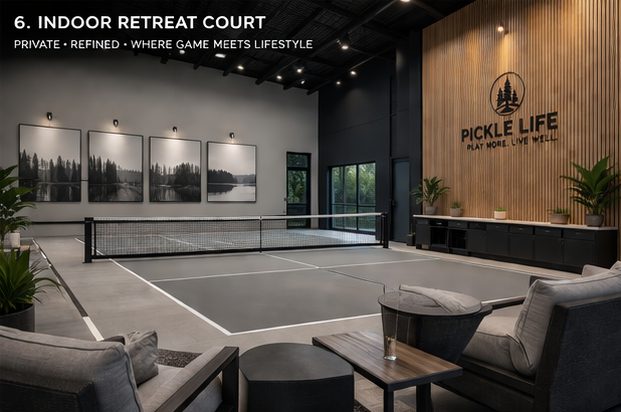
Six directions for your court
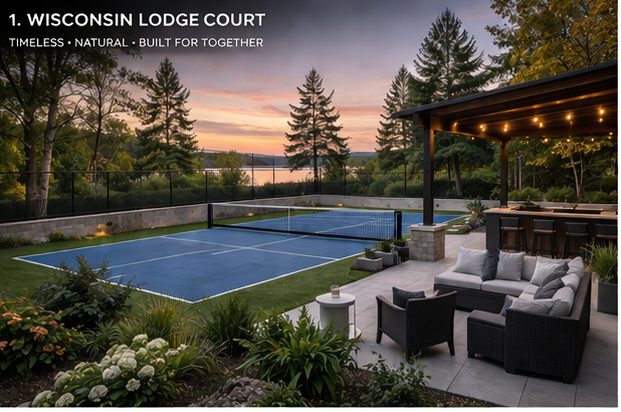
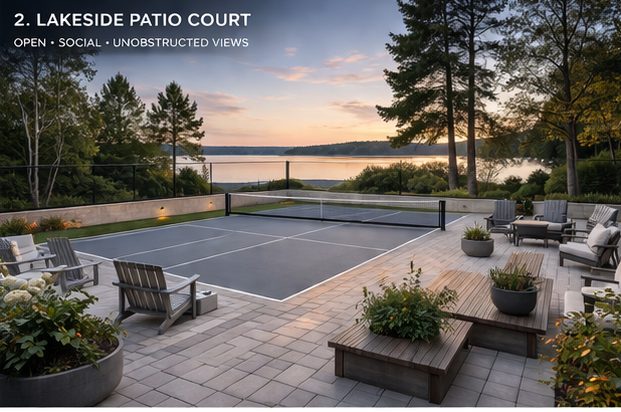
Every court we design is custom, but most start from one of these directions. These are design concept renderings to help you picture the possibilities.
Let's plan your court
We'll walk your property, check grades and drainage, and talk through layout, lighting and style.
Open the Request Form Opens our secure request form in a new tab.